Setting up Ruby on Rails with RVM, Puma, Mina, Nginx, Sidekiq and Redis on Amazon Linux 2
After using for several years this same stack on Ubuntu, our AWS Expert recommended us to move to Amazon Linux 2 in order to take advantage of optimized hardware, pricing and other benefits of using their OS.
The stack includes:
- Ruby (Installed using RVM, but you can use any other version manager, or compile yourself ruby)
- Nginx (As web server + reverse proxy to Puma server)
- Puma (As rails app server)
- NodeJs + Yarn (If your application needs to compile assets)
- Sidekiq (For background jobs processing)+ Redis (As persistence engine for Sidekiq). Since you are in AWS ecosystem you could also use Elasticache instead of local Redis, just parameterize correctly your Sidekiq if you want to do so.
- Mina (For deployments, but you could use Capistrano, or git clone/pull the project manually)
I made this same guide for Ubuntu (Thanks to Serhan Balcı for stealing my article. Please increase awareness of this guide by stealing it again and posting it as yours, lol). See:
Upgrading your system and installing dependencies
The following updates the system, installs git, cmake, nginx and postgres client. Note that if you do not use postgres as database client of your app, you would have to use proper client libraries, for example mysql.
Before copy and paste the following commands please be aware that it installs postgres libraries. If you don’t use postgres omit them. If you don’t want to accept the libraries installing right away remove the -y argument.
sudo yum update -y
sudo yum install curl git gcc make -y
sudo amazon-linux-extras install nginx1 postgresql11 -y
sudo yum install postgresql-devel postgresql-libs -y
In addition you can customize your hostname with, replace railsapp with how you want your host to be labeled:
sudo hostnamectl set-hostname railsappInstalling Ruby
My personal choice is RVM, but you could also use other options or compile ruby from source yourself.
Import RVM gpg key (You should use the key from rvm.io site, not the one posted anywhere on internet for security reasons, be aware!):
gpg — keyserver keyserver.ubuntu.com — recv-key 409B6B1796C275462A1703113804BB82D39DC0E3 7D2BAF1CF37B13E2069D6956105BD0E739499BDBAfter imported download and run the RVM installation script with:
curl -sSL https://get.rvm.io | bashThen source it, note how my default user is ec2-user, if it is different change it to your user name. (Or exit and login back with SSH):
source /home/ec2-user/.rvm/scripts/rvmNow install your desired ruby (In my case I am using latest 2.x version, which is 2.7, but you can install the one that suits your app):
rvm install 2.7.0
rvm use 2.7.0 — default
Now you can test it with ruby -v command:
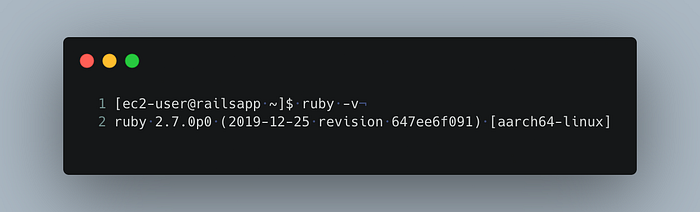
Setting up Nginx
Basically you got to place your app configuration inside a file that should be imported in the nginx conf. In order to do that my suggestion would be to create a folder, then create a file that contains the app configuration and then referencing it in nginx.conf file:
Create the folder:
sudo mkdir /etc/nginx/sites-enabledCreate the file:
sudo nano /etc/nginx/sites-enabled/app.confNow this command initialized a file in the previous created folder named as app.conf, but it will only be saved once we fill in with contents and save it using nano, you can use your editor of preference. Place the following configuration and be sure to tweak it to your needs:
Now lets include this configuration file in nginx.conf file:
sudo nano /etc/nginx/nginx.confInside the http block, include the following line:
include /etc/nginx/sites-enabled/*.conf;So it looks like this:
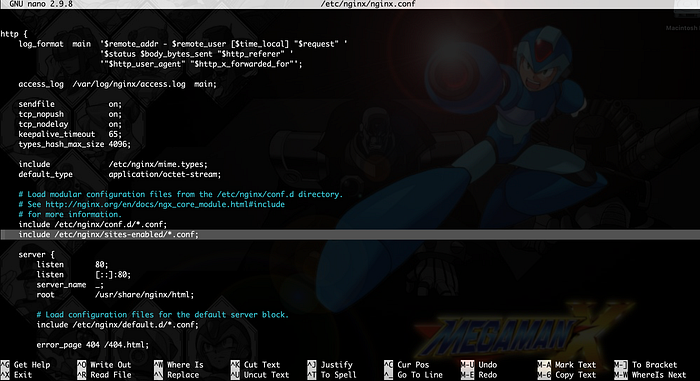
In addition of our purposes this will tell nginx to include all configuration files inside the sites-enabled folder, so if you got more apps/pages you could include another app.conf file there and it will be loaded by nginx. Also you could add sites-available folder and symlink your configuration files in sites-enabled but thats out of the scope of this guide, just a recommendation.
Finally, and pay attention here, the nginx got to have access to the application’s path, so you either setup proper permissions OR run nginx as your ruby user, in this case ec2-user. For educational purposes lets just scroll up to the first line of the nginx.conf file and set and replace the user to ec2-user (or the user you are using).
user ec2-user;Save and exit (With Ctrl + X if using nano).
Enable your nginx service:
sudo systemctl enable nginxInstalling your Rails app
Now, here is my suggested folder structure. It is friendly with mina and capistrano, also if you want to implement different stages like staging or production it would be work too, but you are free to use any.
Note that if you change it you got to modify your app.conf file for nginx. Remember to reload nginx each time you modify those configuration files.
The folders structure is:
production
-> railsapp
--> current
--> releases
--> shared
Inside the current directory is where our Rails application would be. Lets create the structure and clone our project
cd
mkdir production
cd production
mkdir railsapp
cd railsapp
git clone xxx
mv xxx current
See how I renamed the folder project with just current. If you cd current and print your path it would show like this:
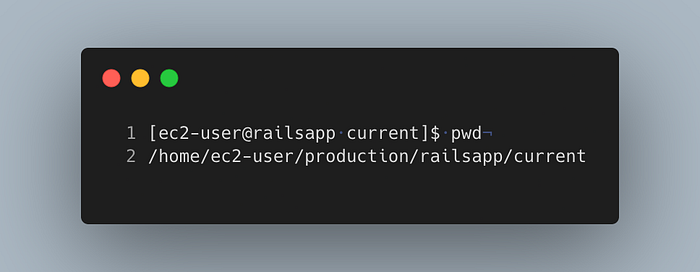
Now lets install bundler and then install all our gems from our Gemfile:
gem install bundler
gem update --system
gem update bundler
bundle install --without development test
You might encounter errors in this process if your Gemfile contains gems that needs dependencies that we have not installed. So you got to closely check at errors in this step and look what dependencies are unmet. For example in our case we assumed that we were working with Postgres, so we installed in the first section of this guide the Postgres dev libraries, if we would have not done that then we would get an error in this step because our Gemfile contains the pg gem. If you are using Mysql or other driver, you have to stop here and install the proper dependencies.
But if your Gems list installed successfully then let’s continue by setting up Puma service as systemd service so we see our App in action.
Note: If you are using dotenv, or you need to add further environment variables this is when. Create your .env.production file and fill it in now.
Setting up Puma
We are setting up puma to run binding to a Unix socket, not TCP socket, here is a good explanation on why it is a good idea.
Assuming you are using Puma and it was installed because it was located in your Gemfile, then you should have it ready to use. You can cd into your app folder and run puma command and it will try to boot your application in development mode. But let’s install it as a systemd service.
sudo nano /etc/systemd/system/puma.serviceThis will initialize a file in the system directory, which should include your puma configuration. Replace the paths and the user to your needs.
Save and exit (Ctrl + X if using Nano).
Now enable it with:
sudo systemctl enable pumaBefore we can start our Puma service we need to make sure that our application contains proper configuration. See how the puma.service file refers to config/puma/production.rb file. You should modify that file accordingly, also note that this production file could be named different depending on the stage you are using, for example staging.rb if that is the case.
The previous gist is quiet generic, in terms that the app_dir variable was set to a value were it contains the path of 3 levels up of the production.rb file, and that is because the app root is located in:
/home/ec2-user/production/current/But our puma production.rb configuration file is located in:
/home/ec2-user/production/current/config/puma/production.rbIf this is not the case your place your Rails app root folder in app_dir. I just tried to make it generic.
Also note that we send a true to the daemonize method. Current puma version needs the daemonize option to be in that file and not in the service configuration. Depending on your puma version (Older versions needed this, as in my previous Ubuntu guide) you would have to remove that from the puma configuration file and just add the argument -d in the puma.systemd file at the end of the ExecStart command. As of writing of this guide latest Puma is 5.6.4 (Birdie’s version)
Finally check that we are setting our puma logs to be written in log/* directory, we are needing to read those files later if we find any troubles.
Make sure your project contains the puma configuration folder and now start the puma service:
sudo service puma startThis should start your puma service. If it doesn’t check the following:
- Your app has connection to your database, try to run the rails console in your project directory and execute any SQL query. Make sure you placed all your environment variables, if needed.
- Your puma configuration contains correct paths.
- The version of your ruby matches the ruby you placed in your puma.system file, note that for this guide we are using 2.7.0
- Check the puma.stderr.log and puma.stdout.log for any outputs that would prevent the app from starting (Like a sytanx error in your application, if this is the case the puma running in Development mode won’t catch any syntax error because it does not do a full scan of the source code, but in production the boot process does it)
- Check the output of
jornalctl -u puma -f -n 100 - As a final check just go to your app folder, run
puma -e productionand let it start. Then in a different ssh session runcurl localhostand check the output of first ssh session.
Now you should have puma running your Rails app. Stop it and let’s setup deployment with Mina.
sudo service puma stopSetting up Redis (Optionally needed for Sidekiq)
First you got to install Redis, fortunately our friend jpickwell created a super simple script to install on AL2, just use it and it will do all, no questions, lol.
Remember we are using local Redis, if you are in AWS ecosystem you might want to use Elasticache, if so you don’t have to install Redis, you just have to configure Sidekiq to use Redis on from Elasticache service, you would then skip this section of the guide and go to setup sidekiq. If that is not the case then keep going and by default Sidekiq will try to connect to local redis using REDIS_URL=redis://localhost:6379 .
wget -O redis_install.sh https://gist.githubusercontent.com/jpickwell/e6857da4ba17c83ef09729c5d448f6bb/raw/67783f35b666afb38e82120781f7ceb75ef1f1f9/install-redis.sh(Or you could install it yourself, I got burnt trying to find out how to do a clean installation, leave in the comments if you find an easy way to do it using yum or whatever)
Run the installation script:
sudo sh redis_install.shMake sure it is running by typing redis-cli and the PING command:
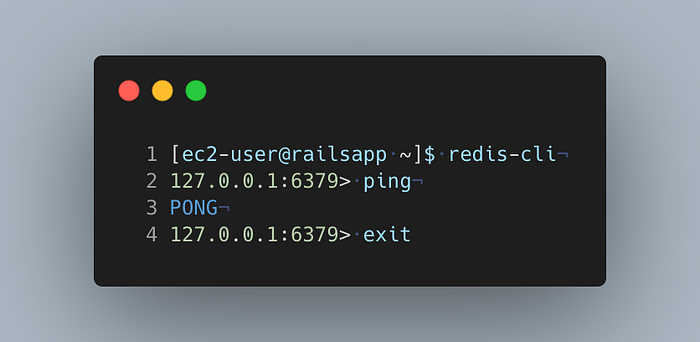
Now Redis is installed, we can now setup Sidekiq.
Setting up Sidekiq
Assuming you got access to an Elasticache Redis instance OR you got Redis listening on localhost you should now setup the Sidekiq systemd configuration file.
sudo nano /etc/systemd/system/sidekiq.serviceNow modify to your needs the following sidekiq configuration script
Modify the user and the WorkingDirectory path. Make sure you have a config/sidekiq.yml file that contains your sidekiq configuration, for example it could be simple as:
:concurrency: 5
:queues:
- default
- critical
Now enable it:
sudo systemctl enable sidekiqAnd start it:
sudo service sidekiq startIf it does not start then same as Puma troubleshooting you should check why would it be not starting, most likely a miss configuration in the boot time, like a missing environment variable or lack of database connection. If none of the above works try to run Sidekiq manually and let it output any errors by just stepping in your rails app root and running sidekiq .
Setting up NodeJS and Yarn (If your application needs assets precompile)
If your application needs to compile your assets then you would have to install NodeJS and Yarn. If your Rails app is api-only you can skip this step and remove the precompilation task from deploy.rb file.
First install the Node repo (I am placing here the URL but you should go into nodejs site and pick the repo URL from there)
curl -sL https://rpm.nodesource.com/setup_16.x | sudo -E bash -Now install NodeJS:
sudo yum install nodejs -yConfirm with node -v
Now install Yarn repo:
curl -sL https://dl.yarnpkg.com/rpm/yarn.repo | sudo tee /etc/yum.repos.d/yarn.repoand install Yarn:
sudo yum install yarn -yWe will see how it works in the deployment script. If you omit previous steps Mina (or any) won’t be able to run rails assets:precompile task.
Deployment with Mina
First lets erase the project folder and let’s prepare the folder structure that Mina needs in order to make deployments.
cd
rm -rf production/railsapp
Now logout of your remote machine and go back to local. Setup the following deployment script. Place it in config/deploy.rb.
You would have to edit the following variables:
- application_name
- domain: Put your remote ip or Url
- deploy_to: Make sure it matches your app path
- repository: The git repository (Make sure you have ssh access)
- branch
- user: The user which you use to connect with ssh
- forward_agent: Leave it to true, but make sure your
id_rsa.pubis included in remote’s machinessh/authorized_keysfile.
After that is ready just run the mina setup command and it will create mina’s folder structure for your project using the parameters you setup before. Read more info on mina setup on their Getting started guide.
mina setupThis will ssh in to your remote machine and create the proper folder structure, now in case you are using dotenv you have to SSH back in to your remote machine and place the proper content of .env.production file in production/railsapp/shared/.env.production . This is because on deployment mina creates a symlink of this file in the current version’s folder of the project, so you don’t have to setup that file each time or even worst, upload your sensitive data in a repository. If you need mina to symlink more files or folders modify your shared_files variable in the deploy.rb script.
Note how in the deploy.rb file we have a command to run assets precompilation, if your Rails app is api-only you can remove that line.
Now you are ready, just run deploy and it will show you what troubles it encounters. Read them closely as almost all the times the problem is something quite obvious but one tend not to read the complete error description.
mina deployBonus: Setup SSL with Lets encrypt and Certbot
If you need to setup SSL for your project I highly recommend to use Lets Encrypt and Certbot to basically do all the work for you. (Love those guys, when I go billionaire I will send some churros, promise).
Install EPEL packages:
sudo amazon-linux-extras install epel -yInstall certbot for nginx:
sudo yum install -y certbot python2-certbot-nginxGo back to your /etc/nginx/sites-enabled/app.conf file and replace your server directive to use your secured URL:
server_name example.com www.example.com; Save it, reload and check nginx configuration with:
sudo service nginx reload
nginx -t
If all went good you are ready to run Certbot:
sudo certbot --nginx -d example.com -d www.example.comFollow the instructions and you are ready to go!
Conclusion
We have setup a Rails app with all the basic dependencies on Amazon Linux 2 machine, ready to run for a production environment. All the steps described are just the collection of steps that I have gathered through the years; some of them could seem hackish but I encourage you to improve this process by leaving in the comments any ideas on how to make this smoother.